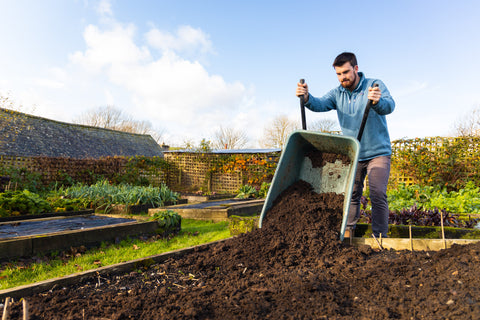
Back to All Posts How to Fill a Raised Garden Bed affordable|January 13, 2023 By Sabina Pariser Raised garden beds can be an attractive and practical solution for growing your own produce. There are a variety of benefits to adding raised garden beds to your outdoor space. Raised beds are helpful when working with a small outdoor area because they allow gardeners to create their own unique structures that mimic nature, increase crop production, and save space. Framed beds can be an accessible option for those of us who experience limited mobility or other physical considerations. Raised beds are ideal if the native soil on your property is compromised or contaminated in any way. Once you’ve decided on where to place your raised beds and what materials you will use to create your garden bed, the next step will be deciding how to fill the bed. Filling a raised bed does not have to be an expensive endeavor, and you can often use spare resources from your garden to get started. Below are three different options for filling a raised bed based on differing economic factors. The first option will include ideas on how to fill a raised bed with little to no outside expenses, while the second option will be an affordable alternative. The last choice will discuss possibilities for gardeners that have a large budget to contribute to their garden beds. Ideally, there is sufficient information here for everyone to get started on their journey towards establishing raised beds in their garden. Option #1: Hügelkultur Hügelkultur is a German word meaning “hill culture”. Generally, Hügelkultur is a mound that is constructed out of wood debris and other compostable materials found in the garden. It is an efficient way to reuse organic material instead of letting it go to waste. Over time, Hügelkultur can help improve soil fertility and maintain water retention. The technique is a straightforward method that allows you to use free and readily available resources to build productive soil within your garden. We can use Hügelkultur-inspired methods to build the base and middle layers of your garden bed. Step one: The first step to filling a bed using the Hügelkultur method is to gather woody material such as small logs or large branches at the bottom of the raised bed. The logs can sit directly on top of the existing native soil and can be positioned to fill the bottom third of the raised bed. Typically, the woody material used as the base layer is too bulky for a traditional compost pile because it will take years to decompose. However, small logs and large branches are ideal organic materials for the base layer of a raised bed due to their natural ability to aerate the soil and retain water. Step two: Once you’ve filled the base layer with logs and branches, you can begin to fill the middle layer of your raised bed. You can use small sticks, brambles, tree clippings, prunings, woodchips, leaves, or grass clippings. Be sure to pack the middle layer tightly to fill the gaps between the base layer and the middle layer of the bed to avoid unnecessary soil settling. If you add an excessive amount of nitrogen-rich green matter such as grass clippings, manures, fresh leaves, or weeds into the middle layer of the bed, you will want to wait about a week or two for the green material to turn to brown before adding the top layer of soil to your compost. It is possible for nutrient-rich organic matter to be overused in the middle layer, which can have an adverse effect on the soil. Therefore, allowing the middle layer to sit before adding the top layer of soil to your bed will ensure a healthy nutrient balance is established within the bed. Step three: Once you’ve completed the base layer and middle layer of the raised bed, you can add about twelve to eighteen inches of fertile soil to finish the top third layer of the bed. Most vegetable crops only need about twelve to eighteen inches of productive soil to grow and become established. Apply the top layer of soil directly onto the middle layer and gently smooth it out across the raised bed with your hands or a gardening hoe. You can get started with growing your own produce right away with annuals such as squash, tomatoes, and fava beans. Image: Vego Garden's useful diagram on how to fill their beds using the hugelkultur method. Shop Vego Garden beds. Cost-free options: If you reside in an urban environment where you do not have access to organic garden debris such as logs, tree clippings, or plant prunings you can reach out to your local community garden to ask for free resources for your raised bed. Another great option is to contact a resident arborist to see if they have any unwanted plant material that you can reuse. Most arborists are happy to drop off free logs and tree clippings because it saves them time and money by not having to haul their debris to the dump. Lastly, if you have access to unused native soil on your property, you can mix it into the middle layer of your garden bed. However, it is important to get a soil test done before mixing native soils into your vegetable beds to rule out the possibility of soil contamination. Option # 2: Sheet Mulching In permaculture, sheet mulching (also known as lasagna mulching) is a cold composting technique that is used to build soil, suppress weed growth, reduce water evaporation, and recycle organic materials. Sheet mulching is a no-dig gardening method that mimics the natural process of allowing organic matter to slowly decompose over time. Sheet mulching is an affordable option for starting raised beds because there are a variety of choices that you can use as organic material to make up the ingredients of your sheet mulching layers. Step one: The best way to get started is to source materials that are readily available within your area. To begin, you will need unbleached cardboard or a newspaper. Personally, I prefer to use unbleached cardboard because it is easy to obtain large amounts of free unbleached cardboard from local restaurants, coffee shops, or grocery stores. The newspaper and/or cardboard will act as the layering component of the mulch. Next, you will need to decide what ingredients you would like to add in between the layers of cardboard or newspaper. A diversity of ingredients is a key component to building nutrient-rich compost, so try to find a varied mix of green and brown organic waste. This can include animal manure (horse, cow, sheep, goat, rabbit, chicken), kitchen scraps, coffee grounds, leaves, straw, hay, tree trimmings, woodchips, grass clippings, or old organic potting mix. * A note about finding outside materials: Whenever you look for outside materials to use in your garden beds, it is important to understand what you are placing into your soil. If you plan to use straw or hay, it is essential to find herbicide-free forage. Likewise, if you intend to use animal manure, please speak with farmers to find out what kind of feed the animal was given. Herbicides can be quite persistent and are likely to be found in the manure of an animal who was fed treated hay. When using coffee grounds, tea leaves, and kitchen scraps, local and organic sources are best. It is important to avoid unnecessary pesticides and herbicides from leaching into the vegetable raised beds, when possible. Lastly, do not use any pressure-treated wood such as plywood for the layers in your raised bed. Step two: Cut down any existing vegetation at the bottom of the raised bed. Leave any trimmings or grass clippings in place. Water the area until it is soft and damp. Step three: Lay down the first layer of cardboard or several layers of newspaper. This will act as a weed barrier and will quell the growth of new weeds by blocking sunlight. This layer will be about one or two inches thick. Step four: Cover the cardboard with a three-to-four-inch layer of nitrogen-rich green compost. This includes manure, kitchen scraps, coffee grounds, tea leaves, grass clippings, or fresh green leaves. Step five: Add more water Step six: Add an additional one-to-two-inch layer of cardboard or newspaper Step seven: Add about three-to-four-inches of carbon-rich brown compost. This includes dried leaves, straw, sawdust, wood ash, or paper. Step eight: Continue layering until you have about twelve-to-eighteen-inches left in your raised bed. Step nine: To begin planting immediately, you can choose to add a top layer of soil to your raised bed. Or, for a more affordable option, you can cap your raised bed with a two-inch layer of straw or wood chips. When you are ready to plant, simply move back some of the mulch and dig a planting hole. Add a shovel of finished compost into the hole and set the plant or seed into the hole. Replace the mulch around the bottom of the plant. Image: Sheet mulching example. Image credit: Ryan Flickr Option #3: Purchase Bulk Materials One of the quickest ways to get started with filling a raised bed is to purchase bulk materials. Filling your bed with purchased soil will be the most expensive option but it allows you to immediately plant a variety of deep-rooted crops. You will still want to trim any existing vegetation and add a weed barrier to the bottom of the bed. Again, unbleached cardboard is a great natural solution and is a preferred barrier over landscape cloth or plastic. The cardboard will naturally decompose over time and contribute to the soil’s overall fertility, whereas landscape cloths and plastic will suffocate the soil. Once you’ve prepped the weed barrier, you can start to fill the rest of the bed with finished compost and soil. You can purchase soil and compost from local vendors, plant nurseries, or distributors. Often, there are financial incentives to purchase bulk orders that can be delivered to your house. Lastly, you can also buy bagged soil which is a convenient and tidy option for filling your raised vegetable bed. There are a variety of different opinions on what contributes to productive and fertile soil for vegetable garden beds. Generally, the desirable soil characteristics that are necessary to making soil fertile include permeability, nutrient content, water retention, aeration, and stability. It is best to research the appropriate soil options in your area based on the availability of materials and local climate considerations. Looking Ahead… After you have filled your raised bed and planted your first set of crops, you are ready to shift your focus toward creating your own organic fertilizers and compost. Typically, no-dig raised beds will need about two inches (5cm) of fresh compost added to the top layer of the garden bed on a yearly basis. Creating your own compost is a vital step toward becoming a self-sufficient gardener. It will also save you from purchasing annual compost to add to the top layer of your raised bed. Learning how to grow food for free is a gratifying journey and building your soil is a key component to achieving this goal. Please enable JavaScript to view the comments powered by Disqus.